Check out my music: https://soundcloud.com/playinmyblues

Tuesday 17 December 2019

Electronic Music - What to Buy When Starting Out?


This is very much a personal account of what I am using to make electronic music. One of the most important things you can do is figure out what works for you. What do you like when it comes to making music?

My collection of synths started off and continues to be more along the lines of the budget conscious and continues that way. Some Korg Volcas, use Microkorg XL, Roland SH-01A, Uno Synth, and a D-05. A Behringer Neutron is for Christmas. Many are not used all the time. I also have effects pedals - Digitech RP100, Zoom B2.1u, Boss DS-1, Danelectro Wasabi Reverse Delay - those were purchased when I played more guitar. EHX Oceans 11 and Zoom MS-100BT were purchased with synths in mind.

Another new purchase has been the Empress ZOIA. It is both a modular effects pedal and a modular synth. You can combine the two parts to your liking. It is not all that hard to learn but if you are considering it, it is worth watching a couple of YouTube tutorials on it to see if it might fit the way you like to work.

I also have a iPad with Korg Gadget 2 and a few other apps like the Moog Model 15. Some apps I do not really use, to be truthful but they are there. Many apps like this sound very good. Korg Gadget 2 is its own DAW with all the apps or Gadgets necessary to cover just about any type of synthesis there is.

Other budget based options are VCV Rack and Caustic for computers. These can be made to sound very good even though they are free. You have to put the time in, just like learning hardware and plugins for your DAW.

If I had my choice and more room to spare, I would be considering synths like the Novation Peak, Moog Grandmother and Matriarch, a Minilogue XD, maybe a Prologue, maybe some DSI synths. Maybe a Novation Circuit soon as well as a Behringer Model D. - Those two could be made to fit in my current setup. I like the idea of modular but I have neither the money or the space for a modular setup.

The Moog One is way out of my budget so at this time I do not spend time thinking about it. This is also true for the DSI synths. The Novation Peak desktop module is about as high as I could go and I would have to save for quite some time for that.

Take some time to consider how you want to hear your instruments. Do you want to record? Do you want an audio interface with MIDI IO? Do you want a mixer and if so, with USB audio and what about number of audio channels?

What about speakers? Monitors to hear with, or some might laugh or shake their heads but I am using a set of Altec Lansing 6.1 speakers that are meant for surround sound on a computer. I only use stereo out with a bass speaker for this setup as I am using the stereo plug. These were there for me to use so at this time I am not spending money on monitors. I like sound so they suffice.

In the end, you should watch a bunch of YouTube videos to figure out if you like the way different devices work. When you buy, that is when you are really going to find out if certain pieces of equipment work for you. It is well worth the time to learn how each piece of equipment works to figure out if you really like it.

In my opinion, it when people do not spend the time learning their equipment that GAS strikes.
To start with, whatever you buy, you should get something that is oriented towards subtractive synthesis. It is by far the easiest type to learn and the most common among equipment used. It can be analog, virtual analog, or a VST. Given the paragraph above, I highly suggest reading and APPLYING Sound on Sound's "Synth Secrets." Look it up.

That last bit brings you to the option of a MIDI controller. Any synth with a keyboard these days will act as a keyboard MIDI controller. If you are to buy one piece of equipment a wise investment would be a new analog or VA synth as it will act as both a synth and a MIDI controller. It could be a mono synth or a poly synth. It depends on your budget. Have a look around and watch YouTube. If you go with just a MIDI controller, get something with at least 8 knobs with keys. Mini-keys are a possibility but full size keys are nicer.

One last note, buying used can very often be a good option for many pieces of equipment. If you can buy using eBay or Reverb as they have some buyer protection practices in place. If you buy used from the classified ads such as Kijiji, Craigslist, or the newspaper, it is best to be able to try the piece of equipment in person so you do not get burned. I have sold some of my own equipment through online classified ads and mailed them to buyers with them not having tested them. I never had a complaint. But, as a buyer, there is always a risk.

Thursday 7 November 2019

Designing a Wah Sound with the IK Multimedia Uno Synth

Introduction:

This time around, I present a tutorial on designing a wah sound using the IK Multimedia Uno synth. If you already understand the basics of using the Uno's editing matrix and the rest of it, you can go right to the summary of steps provided below. If you need a little more information, read at least the part in the Preamble and Hidden Menus before diving into the heavy stuff with all that information. You will find out a lot more information about the Uno workflow and what each control does. I know I did.

It is a good idea to read the rest of the information as it will help you learn a lot about sound design in the process. Have fun!

Summary of Steps:

Step 1) Use start from Zero patch
Step 2) WAVE 1 and WAVE 2 – setting them to triangle waves
Step 3) In the OSC section, make sure TUNE 1 and TUNE 2 are at 0
Step 4) Set WAVE 1 and WAVE 2 levels to 127
Step 5) Turn Cutoff all the way up
This allows the low pass filter to pass all frequencies.
Step 6) Turn up Sustain using the ENV ADSR hidden menu
Step 7) Make sure FILTER is set to low pass
Step 8) In the LFO section, set WAVE to triangle, RATE to 16 in note sync section, and FILTER all the way up.
Step 9) Dial back the CUTOFF to about 25 or even as low as 5 and turn up RES to 64
To my ears, this has a more gentle peaking of the wah sound.
Step 10) Experiment with RES(onance).
Press the FILTER button. Now you can change the RES control, which stands for resonance. This control changes how intense the peak of the filter gets around the cutoff frequency.
Step 11) Experiment some more with FILTER RES and LFO FILTER and CUTOFF
Work on getting more bass or more high pitch sounds by using these controls.
Step 12) Working with the FILTER ADSR envelope
Getting a wah sound using only the ADSR envelope.
Step 13) Step 13) Using both the FILTER and the LFO to get a wah sound!
Set the following: LFO RATE = 1. FILTER ADSR A = 15, D = 15


Preamble:

My original spin on this tutorial was to talk about reading the Uno's user manual. Fortunately, the user manual for this synth is not crammed with text so it is easy to read. Reading the user manuals for synths is often very helpful and was here. But I had also learned a lot from working on getting wah sounds from other synths. The user manual sections to read up on for the Uno are the Filter Row, the Envelope Row, and the LFO Row, pages 13 and 14. It is not necessary to read the user manual to go through this tutorial.

This time, I used the hardware interface on the Uno synth itself. It can be faster at times to do this, once you understand how to access all the controls. Remember that the OSC, FILTER, and ENV buttons can be pressed and held down to access the hidden menus.

While I like to use the hardware interface to make changes to the controls, it is also useful to have the Uno Synth Editor also running so you can see all the controls at the same time. This is very helpful because once you change rows in the hardware editing matrix, it is very easy to forget what the previous sections' setting were set to. The layout is a little different than the synth itself but you should become used to it quickly enough.

One thing I changed recently was the knob behaviour. I changed it from absolute to pass-through. This helps prevent your sound from changing oddly when you change the hardware controls on the synth from section to section. Absolute knob behaviour adjusts the knobs when they are adjusted from section to section. Pass-through knob behaviour means that the knob has to pass-through the setting for that control for a change to take effect. Relative knob behaviour is another option but I do not really like how it works. It seems a little unintuitive to me. The description is in the Uno Synth User Manual. Use the Uno Synth Editor to change knob behaviour.

Hidden Menus:
OSC hidden menu gives you access to the WAVE 1 (oscillator 1), WAVE 2 (oscillator 2), and NOISE levels.
FILTER hidden menu gives to access to all the controls for the ADSR envelope for the filter.
ENV hidden menu gives you access to all the controls for the ADSR envelope for the amplifier.


As with my previous tutorials, I am providing a summary of the steps. This can be much easier and faster than reading through each step. PLEASE do take the time to read each step though.

Steps in Depth:

Step 1) Use Start from Zero patch

If you do not have a start from zero patch, now is the time to make one. I find it to be one of my best tools in learning how to build your own sounds. It is pretty simple to do. Start at the top, either on your Uno synth itself or using the Uno Software Editor. Simply turn all the controls to zero. If you want to skip some, do not worry to much about the effects buttons although that can help as well. Then choose a patch where you want it saved and write that down or memorize it or both!

Why you ask?

Turn Control to ZeroSome people use an initial or “init” patch wherever they find they like to start and work from there. Some people probably have even more than one init patch because they know how to work from different points to get different sounds. Some synths even have a standard init patch and others have something that produces a random patch. I find it very useful to zero out everything because I am still fairly new to sound design and playing synths. I like to know the effect of the control from zero.

Set GLIDE to ZeroWhile people try their best to write tutorials that are thorough and well thought out, sometimes things sneak through. At this point, especially if you have not been using your Uno Synth Editor app, take the time to press the GLIDE button. The press the down triangle (or arrow if you like that better) until the number reaches zero. Save the change to your zero preset. GLIDE is located in the section of the synth on the right side. That is why it escaped my notice while I was zeroing out all the other controls.

>>>>>Before we continue on with the rest of the tutorial, one thing should be said. Do not be disappointed if you lose track of where you are or something does not work out the way it is supposed to according to the tutorial. Maybe the tutorial was written in a way that did not suit you. Simply go back to your zero patch and start again. This tutorial was written over a number of months and when I would come back to it each time, I would have to start from the beginning on the Uno synth and build the patch again. And this time around, I must have built a similar patch each time, figuring out what effect each control has on the sound. That only took about a fifty times! No exaggeration there.

This restarting is actually a good thing. It gives you a lot of practice and when you go to build the same patch the next time, the steps come back much easier. Or, maybe you want to make it sound a little or even a lot different. In those cases, remembering the steps used will help you as you learn which controls did what and how much the sound changed and how as you build your new patch.

Remember, to save your patch, press and hold the PRESET button until the display flashes the current patch number. Then, if you want, you can change the patch number using the down and up buttons to the patch number you want and press PRESET again to save it to that location.

OK! ON WITH THE SHOW!

Step 2) WAVE 1 and WAVE 2 – Setting Them to Triangle Waves

This is often seen on other synths as OSC1 and OSC2 which stands for oscillator 1 and oscillator 2. These controls select which waveforms you want to use for your sound. Your options are triangle, triangle-sawtooth, sawtooth, sawtooth-square, square, square-pulse, and pulse. When the control is set to a waveform that is some combination of two adjacent waveforms, there is a dash that shows up on the display. Turning the control one way or the other morphs the waveform closer to the waveform on either left or the right.

So how does that work? Are you boggled by that explanation? Have a look at the example waveforms below. They give you an idea of what each type of waveform looks like.


Triangle waveformTriangle waveform:


Sawtooth Down waveformSawtooth waveform:


Square waveformSquare waveform:


Pulse waveform:
Pulse waveform

With this pulse waveform, the thick line can move back and forth as indicated by the arrows. When the thick line is at the place indicated by its current position, the resulting waveform is a square wave, as seen above.


If you use the Uno Software Editor then you can immediately how the waveforms morph from one to the next as you turn the control.

Take two waveforms above – the triangle and the sawtooth. In the Uno Synth Editor software, it only shows the triangle, sawtooth, square, and pulse waveforms. The other waveforms, such as the triangle-sawtooth waveform are something between a triangle and a sawtooth waveform. The closer the control is to the triangle section, the more it looks like a triangle. The closer it is to the sawtooth waveform, the more it looks like a sawtooth. The between waveforms are a combination of the two adjacent waveforms.

For comparison with the tutorial on the Korg Volca Keys, set the waveforms to Triangle, trI. Feel free to use any of the other waveforms for oscillators. The sound will be different but you will still get the wah sound with the rest of the tutorial.

Wave 1 and Wave 2 - Set to Triangle


Step 3) In the OSC section, make sure TUNE 1 and TUNE 2 are at 0

It should already be there if you use a zero patch. But you can play with it if you want. There are two sections to the TUNE controls. One section detunes the oscillator in a range of 0 to 99 and 0 to -99 – the ranges being on either side of the 12 o'clock position. This allows for detuning to +/- 100 cents. The second section, which comes after the 0 – 99 range, has a range from 0 to 12 or 0 to -12. This allows for detuning which each value of 1 being 1 semitone. A semitone is one half step on a keyboard. That is like going from B to C or C to C# or G# to A. Of course, going from A to A flat works as well.

12 o'clock

Tune 1 and Tune 2 - make sure they are at 0

Step 4) Set WAVE 1 and WAVE 2 Levels to 127

Press and hold the OSC button until the LED blinks. Set both WAVE 1 (oscillator 1) and WAVE 2 (oscillator 2) Levels to hard right. You might have to turn the control hard left before it will turn up to 127.

Control Knob to 127
Level 1 and Level 2 - Set to 127

Step 5) Turn Cutoff all the way up

This allows the Low Pass Filter to pass all frequencies.

Set Cutoff to 127
The rest of Filter should come after adjusting the amplitude envelope. This is so you can turn up Sustain on this envelope so you actually get a sound.

If you play some lower notes here you will get a bit of a low volume thud. Ugh, that kind of sinks to the bottom. Hah! I crack myself up.

I tend to use a MIDI keyboard to play my synths and have used one here. However, the volume is so low on many of these notes that the sound of the keyboard is often louder than the notes themselves. Go into the upper octaves and you will hear a bit of a chirp. You can also change the octave range on the synth itself and use the synth's capacitive keyboard. As that is pretty quiet, you should hear the notes a little better.

Step 6) Turn up Sustain using the ENV ADSR hidden menu

Press and hold the ENV button until the LED blinks. This allows access to the hidden menu for the ADSR envelope for this section. Sustain is the third control here. Turn up Sustain all the way.
Now, play some notes and you should get a nice even sound. It will likely change a little as the LFO tends to change things even when setting the rate to 0.

Envelope Sustain - Set to 127

Step 7) Make sure FILTER is set to low pass

Press the FILTER button. Make sure the filter MODE is set to Low Pass. It should read LP. CUTOFF is actually a FILTER control but it is set apart from the FILTER controls so it can be accessed at any time. CUTOFF is such a useful control that it was determined with this synth that the user should not have to change the section for all the other controls to use it.

Filter Set to Low Pass

Res is going to be left alone at this point. If you are using a zero patch, RES should be at 0.

Feel free to skip the next two paragraphs as they are not essential to the tutorial. However, they can provide some insight into sound design in general.

While working through this material, I think I found a little bit of sound design that could be useful for a different sound but still within the wah territory. If you change the filter to a high pass filter (HP), instead of a low pass filter, the Cutoff control works the opposite way for clockwise and counterclockwise directions. Where a low pass filter allows lower frequencies through and turning the Cutoff control counterclockwise “closes” the low pass filter, it opens a high pass filter. I will have to mess around with that later to work on getting that higher pitched wah sound.

The funny thing about sound design is that it is all subjective. Some sounds tend to be liked by many but, the ones that tend to be a little odd tend to fit in only certain situations. I think this could be the case for the high pitched wah that uses the high pass filter.

Step 8) In the LFO section, set WAVE to triangle, RATE to 16 in note sync section, and FILTER all the way up

Press the LFO button. Set the WAVE control to Triangle. It should read trI.
Set RATE at 16 in the sync section.

Set LFO to Triangle and Rate to Sync 16

The following explains how the LFO RATE works:
This means from hard left, turn it up past the numbers you see go from 0 to 127. Go past 127 and that is the sync section. The values for the sync section of this control are:
1 1, 1 2, 4d, 1 4, 8d, 4t, 1 8, 16d, 8t, 16, and 16t.

1 1 – This syncs the LFO to cycle through once per four quarter notes at the value of the TEMPO. If tempo is set to 60, you get 60bpm or 60 beats per minute. The LFO will cycle through at a rate of 60bpm / 4 quarter notes = 15 cycles per minute. The time for the LFO to cycle once is 4 seconds.
You can test this by setting using a stop watch.
On your Uno, set the tempo to 60.

Set your sequencer to record.
Press and hold only one note as the sequencer cycles through one time.
Press stop on the sequencer.
When you press play again, you should hear it play one note and the LFO will vary the amplitude of the note up and down through one cycle. It will start at a medium point, rise to a high point, fall to a really low point and rise back up to a medium point. Here is a graphic of a triangle wave for an LFO waveform.

LFO Triangle Waveform, Period is 4 seconds

After reading the explanation above, make sure you have the LFO RATE set to 16 in the sync section.
At this point nothing seems to be affected a whole lot. There are a couple of things that can be changed to remedy that. To follow the Korg Volca Keys tutorial on getting a wah sound, I think - I think, that you change the FILTER control (still in the LFO section).

Turn the FILTER all the way up, hard right, or 127.

LFO FILTER Set to 127

Play some notes and now you there is still little variation in tone.

NOTE: When the LFO RATE is in the free running mode, which is controlled by using the values in the 0 – 127 range, the RATE is only controlled by the RATE value.

When use use the values that synchronize with the note values, 1 1 up to 16t, the speed of the LFO RATE is controlled by two knobs. One is the RATE knob which is used to change from 1 1 to 16t. The second knob is the TEMPO knob. This is because note values are always relative to the tempo of the music. Try the differences and see how it works.

Step 9) Dial back the CUTOFF to about 25 or even as low as 5 and turn up RES to 64

To my ears, this has a more gentle peaking of the wah sound. I think I would find this more useful as a rhythm sound in music. A more aggressive peak, giving a more aggressive sound, should cut through a mix a little easier. It all up to your taste.

Dial back the CUTOFF quite a bit – to about 20 – 25 or even down to 5. Now in the FILTER section turn up the RES to about 64.
CUTOFF:     20 -25 (as low as 5)
FILTER: RES:     64

Play some notes as you are dialing in these last two settings. You will really start to hear some action in the tone.
Play some lower notes and you can turn up the FILTER RES and get some fuller sounding notes.

The Uno User Manual says the FILTER control is that it acts to modulate CUTOFF frequency. As the LFO rises, the CUTOFF frequency moves up. As the LFO falls, so does the CUTOFF frequency. If you took the time to check out the other tutorial, on the Korg Volca Keys, this would be EG INT under the VCF section.

One thing to keep in mind with envelopes, of which the LFO is a kind of envelope at times, is that they usually change the sounds you hear at a rate slower than audible frequencies. If you look in the Uno synth’s user manual, (ugh, the user manual!) you can read on page 14, near the bottom, that the LFO can actually get up to 30Hz. The lowest audible frequency we humans are supposed to be able to hear is 20Hz.

30Hz is getting up there and that would qualify as frequency modulation using the regular notes as carriers and the LFO as a modulator in FM synthesis. Something to look at another time, if you like.

Step 10) Experiment with RES(onance)

Press the FILTER button. Now you can change the RES control, which stands for resonance. This control changes how intense the peak of the filter gets around the cutoff frequency.

Before changing RES, dial back the CUTOFF control a little if you have not done so already or experimented with the CUTOFF and turned it back up. This will warm up the tone a little and you will get a less gritty wah peak when it occurs. I will not tell you waht (see that – did it again!) settings are good. You can experiment with the settings as you change the RES control.

Set CUTOFF to less than 127

Turn RES up to somewhere between 20 and 100.

We are definitely getting some tonal changes now. However, the LFO RATE set at 16 (16th notes) is too fast to get a real appreciation for that wah type sound. Go back to the LFO section by pressing the LFO button. Dial back RATE to 1 4.

Set LFO RATE to 1 4 - Sync to Quarter Notes
RATE at 1 4 should be set to sync the LFO to synchronize with 1/4 notes, or quarter notes. If the LFO is still moving too fast at this point, turn down the TEMPO until you get something slow enough like it was waves crashing on a beach or maybe the pace you have when walking.

Step 11) Experiment some more with FILTER RES and LFO FILTER and CUTOFF

Now we can hear that change quite well. I like to hear a little more bass in the wah sound when it peaks. To get this dial back the CUTOFF to around 50. By the way, I changed the RES to 60.

Set CUTOFF to 50


Set FILTER RES to 60

Play some low notes and you can hear some whumping bass as the note goes through the LFO. This is heard better if you hold the note for a bit.

Also take the time to experiment with LFO FILTER. Just because the FILTER ADSR envelope is set to zero for all parts, does not mean that the LFO FILTER control will not affect the low pass filter. There are other controls in the FILTER such as the RES(onance) and CUTOFF. And remember, the LFO FILTER control affects the CUTOFF directly.

Aside here – if you want to add some wacky pitch variation that happens at the same time, that is when you use the LFO PITCH control. I have yet to explore the usefulness of that control. When you do not know how a control will affect things and still like to mess around, try subtle changes. If you want some wild laser sounds, use the PITCH control.

Step 12) Working with the FILTER ADSR envelope

Now, what was the purpose of changing the FILTER ADSR envelope? It does not seem to affect a whole lot at this point.

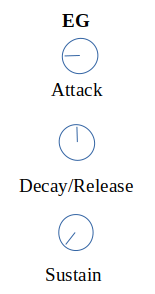
Let's have a look at a representation of an ADSR envelope.

ADSR Envelope Representation

In the graph above, what is not provided are actual values for different points. On the Uno synth, the ADSR envelope values range from 0 – 127. In terms that relate to time, 0 would be the lowest value which could be 0 seconds. The value of 127 could be several seconds or even up to 10 or 15 seconds.

In addition to that, the envelope sections of A, D, and R are not necessarily linear. They are probably not a straight line. What this means is that a low value for an Attack might take less than half of a second. Let's say A = 20 might take 0.20s to rise to full volume. If A were a linear curve (a straight line), that would mean the following:
A = 20,
20 = 0.20s
127 in seconds would be
(127/20) x 0.20s = 1.27s

However, if you repeat steps 1) to 6) and then do the following, you should find out that A = 127 turns out to be something very different than 1.27s.
>1) Press and hold the ENV button.
>2) Set A = 20
>3) Play a note.
>4) Make a note of approximately how long it takes for the note to reach full volume.
>5) Set A = 127
>6) Play a note and hold it.
>7) It should take a lot longer than 1.27s for the note to reach full volume. I estimate that it takes 10 to 15 seconds.

If you were to make a plot of the data, you would see that the curve for A is not linear. But it does make it a lot easier to explain the concept of ADSR envelopes.

On with the rest of this step.

Press the LFO button.
Set FILTER to 0.

Set LFO FILTER to 0


Press the FILTER button.
Make sure of the following:
MODE = LP
RES = 50
CUTOFF = 30
Play some notes and hold each of the for a few beats before playing the next note.

Press and hold the FILTER button.
Set the ADSR as follows:
A = 25
D = 25
S = 0
R = 0

At this point, the ADSR envelope for the FILTER section looks almost like the diagram below. The diagram shows two different relative values but it is close enough to give you an idea.

Play some notes and hold each one. It is important here to completely lift the finger off the key before playing the next note.

You should hear a short wah sound at the beginning of each note. Then it will die off and rise again as the LFO will slowly rise again and fall repeatedly. You will only hear the short distinctive wah sound at the beginning of the note as the ADSR envelope is only triggered for each individual key press. If you play too much legato (not lifting the fingers completely from each key after it is played), you will not hear the wah sound on the following notes, only on the first note played.

This is just another step in sound design and can be useful if you use it in a musical way.

Remember to get to the FILTER ADSR hidden menu on the Uno itself, press and hold the FILTER button until the LED blinks. The effect becomes less pronounced if you turn back the FILTER ADSR, A (Attack) to 0 and D (Decay) to 0. Play some notes now. Turn A back up to 25. Play some notes. Now turn D back up to 64. Play some notes.

Set FILTER ADSR envelope - A is 25, D is 64

Step 13) Using both the FILTER and the LFO to get a wah sound!

As I was learning about how the LFO and the FILTER ADSR can affect the CUTOFF frequency of the FILTER, much of the time when I tried to use both, the FILTER ADSR effect would get lost in the sound of the LFO changing the CUTOFF to give that characteristic wah sound.

You can get a wah sound from both by reducing the FILTER ADSR A and D controls to a lower number so the envelope opens and closes faster than the LFO. To make sure this happens, go to the LFO section and turn back the LFO RATE to 1 RATE at 0 is a little too slow for my tastes. The LFO FILTER can be turned up again if you want. Then go to the FILTER ADSR menu and dial back A and D to about 15 or less.

Set LFO RATE to 1 and FILTER to 127

Set FILTER ADSR Envelope, A to 15 or Less, D to 15 or Less

Play the a note and hold it. You should hear a wah sound that happens within a second or so and they the wah sound rises back up. The first wah sound is the action of the FILTER ADSR envelope. The second wah sound is the action of the LFO rising and falling.

If you are not hearing the wah sound, try reducing the CUTOFF and increasing the FILTER RES (at least a little).

What should you be doing next? Work on using your wah sound in a song. That can teach you a lot as well. It will further your knowledge to figure out how to interplay between two or more instruments. Or even using the one sound in its very own song.

Conclusions:

Try experimenting with the different effects you get with ranges of settings. Saving a preset is a great thing to do. If you can, use the Uno Synth Editor to save your presets. That way, you can see all the values on the dials of the controls. It also helps though to work through things again and again. In the process of writing this tutorial, I went back to the beginning many times. The most important reason for doing this was that I did not always write down what I had done as I experimented with the controls.

This is my third tutorial on making a wah type sound. Doing this has taught me a lot about each synth but also a lot about synthesis and sythesizers in general. I could probably go to another synth like my Microkorg XL and get a wah sound out of it now. At some point I am going to look at Korg Gadget to see what would be good synths to use in similar tutorials.

Feel free to change different controls at different points along the way. Make sure to work with different waveforms (or oscillators as they tend be called more frequently). It make a big different in the sounds you get. Look up what types of waveforms are associated with particular instruments. Those search results will explain it much better than I can.

Around the time I first started writing this tutorial, somebody asked how to get a particular sound from a song. I might get around to it soon, but what I do want to say is, that is how I got started in really learning my synths. Somebody wanted to know how to get a particular sound and I worked on that. None of the three synths used in these tutorials are labelled exactly the same. Their layouts are very different. Their workflows are different. They sound different, for sure, but once you start heading in the right direction, you know it. You also learn what does not work, which is often very helpful.

Another step along the way is to work on getting other types of sounds from your Uno. What about bird sounds? Laser sounds? A motorcyle revving? The siren from an ambulance?


Thursday 15 August 2019

Creative Limitations - Where to Start When There Are too Many Choices

From time to time, I find a question on a Facebook group that gets me going on an answer. While it might only take a few minutes to write out the answer, I look back at it and I say to myself that it would make a good post on this blog. At least I can keep a record of my thoughts if nobody else reads it.

The question this time was regarding the situation of what to do when there are too many choices and no idea of a starting point. This generally happens when people do not know how to fully use the equipment they have. I know because I have more equipment than I know how to use at this time. I am currently in the process of learning how to use about three synths and that is enough to get a surprising amount of variation in my music.

Ideally, you should learn how to use each piece of gear before you buy another piece of gear. This is often not the case and many a musician will complain of Gear Acquirement Syndrome - GAS! I believe the root of GAS is really lack of discipline in learning how to use the equipment you have. To put it bluntly, laziness. The effect of this lack of discipline is making music that is not up to your expectations and when that happens, people often look at other people's gear thinking that their equipment might allow you to make the music you want to be able to make.

This brings us, you the reader, and me, the writer, to the point of asking the question of what to do next? Read on, "salvation lies within" (a little quote from one of my favourite movies, The Shawshank Redemption).


Try paring it down to three synths and see what you can do. If you do not have room, store the rest in a closet or somewhere safe. Once you think you have working those three synths down, push your creative boundaries or set some limitations so you can make some new stuff. At that point, you have to imagine that you are still limited to those three synths. Resist the urge to bring another synth back into the mix. By the way, learning those three synths means learning how to use each synth in its entirety, not just making one patch and how to use that sound in one song.

You might need to learn about subtractive synthesis in general. Or, maybe your synth is an FM synth. Maybe you have a sampler or it is a sequencer you are trying to use. So, yes, learn your synths in general, but all the other equipment needs to be learned as well. Effects pedals and guitars also fall into the range of your equipment so it does not have to be just your synths.

Once you can focus on your work to get beyond the idea that you have too many choices by making yourself accomplish the work with those three synths, add another synth. The end goal is to be able to form a basic idea and build it up.

Three synths is just a creative limitation. You might have read how some bands will give themselves creative limitations for an album. It helps you to limit your choices and be creative within that framework.

Once you create enough, you will understand how to use all that you have and not be bogged down by choices. This is a truth and essentially masters do it in all arts and sciences. People work with their tools so much that they understand how to use everything.

The image I have in mind as I write this is the YouTube videos on Junkie XL's channel. Have a look at his Studio Time series where he shows different synths that he uses. If you gave all that stuff to a noob they would have no idea where to start unless they picked just one thing. Yet he uses it all and he knows what each thing can do. I also imagine that he can make very new sounds using all of the equipment.

Saturday 8 June 2019

In Reaction to a YouTube Video on Plagiarism

This post is in response to a video on YouTube titled "Inspiration vs Plagiarism," by Red Means Recording.

Here is the link if you would like to watch it:
Inspiration vs Plagiarism

There were a couple of versions of this post before this version and I might pull in some other thoughts from the other versions. The main part of this version comes from my daily morning writings that help me get started with my day. The writing exercise is not something I came up with on my own. It is something I read in a book called "The Artist's Way," by Julia Cameron. The actual exercise is to make the first thing you do in the day to write at least three pages of material. It is meant to help get your creative juices flowing. I actually have breakfast first but the spirit is still there.

These daily writings actually help a lot. I write about many different things but a lot of it ends up being what is on my mind. It helps to get those thoughts on paper instead of allowing to continually rattle around up there causing noise. I also make an effort from time to time to write about project ideas I have in an effort to be more productive. Enough about how this post was written and onto the post itself.

This topic of plagiarism is really occupying my mind. I cannot let it go. I think that reason I cannot let it go is that the same day that I saw Red Means Recording on YouTube on his experience with another YouTuber copying his style, I saw somebody use my tutorial to make a sound on their Korg Volca Keys synth video. They posted their short video on Facebook and did not give me credit.

On the one hand, I even said that tin the tutorial that the graphic can be used as a template for recording patch settings for the Keys. There is no patch memory on the Keys.

In many places, I have given credit to Tony Horgan for his book on the Keys. I have used it to help me understand how to use this synth and to double-check what Keys controls actually do. I still give him credit in ways such as citing his book as a good resource on how to learn about the Keys.

It took me about one week to write the tutorial. I put a good amount of effort into it between writing, drawing graphics in LibreOffice Writer, and recording audio clips.

In hindsight, it might have been better to let the Facebook post in which the guy used my graphic to sit without my comment. He may have gotten more comments which could have possibly lead to more people eventually finding my tutorial and blog. I suppose it is not in my nature to do so.

This morning, I took the time to watch one of Red Means Recording's videos where he uses the Teenage Engineering OP-1. I watched it all the way through. Now, after writing this, I will watch one of Yuri Wong's videos using the OP-1. I need to watch a whole video before I make another comment to Red Means Recording. --- So, I watched a couple of Yuri Wong's videos.

My current opinion, based on what I have seen so far, is that Yuri Wong has definitely copied Red Means Recording's style. Whether or not that is actually plagiarism might be for an expert to decide, not me.

If I were to make such a video, I would definitely change things enough so as to be stylistically different. In the end, I would most likely give some credit to Red Means Recording just because of his influence on my work.

YouTube videos such as these are still fairly new in terms of making media. There is a lot to be explored and the ability to create quality videos has become easier with both proprietary and free and open source software. I tend to use the free and open source stuff because it is also monetarily free but, it also promotes education to the masses. Check "free and open source," "FOSS," "creative commons," and more out to see what I mean.

My point in bringing up the software is that these YouTube videos are produced using tools of software. It is most likely not the most popular opinion among many creative types, but copying a style might not necessarily be plagiarism. In the court of popular opinion, those in the know about both Red Means Recording's videos and Yuri Wong's videos, and whose came first (Red Means Recording's if you were wondering), will likely consider it copying. It is most likely considered distasteful among other things but I do not want to get into that.

By the way, in my tutorial located here: Sound Design - Getting the Wah Using the Korg Volca Keys, at the end of the tutorial, I use the sentence "Share the knowledge!" This imperative is a shortened version of YouTuber, Ricky Tinez's phrase of "Share the love, share the knowledge. Knowledge is power" which he uses near the end of his videos. I like the phrase I use at the end of my tutorial but, it never really quite sat well with me because he was using it. Some people might not realize it, unless you are of a certain age, but a version of that phrase used to be at the end of... what was it, Saturday morning cartoons, maybe, a good number of years ago?

My next tutorial ended with something I came up with myself: "Take time to help people out. You will thank yourself later!" Whether or not that works out for me as an ending, time will tell.

Last Thought:
Does Yuri Wong actually give a nod to Red Means Recording when a caption in one of his videos says "Recording to Red," or is it a slap in the face? My first impression on that was a nod to Red Means Recording. Maybe that is the best thought to have.

Saturday 11 May 2019

Designing a Wah Sound Using the Roland SH-01A

The previous tutorial on synthesizers was about designing a wah-type sound using the Korg Volca Keys. Somebody had requested some help in getting that sound in a group on Facebook so I took up the challenge and learned a lot in the process. If you want to learn a lot about designing sounds, trying to emulate somebody else's sound or sounds is a great way to learn.

My recommendation is to listen to the sound before trying to produce it. Lots of people use other people's presets and that is great. It can help a lot I imagine because you get the settings used as well as the sound itself. It would probably help a lot if you listen to your newly designed sound and sensed that something was missing. Then you could go look at the settings in the preset and figure things out from there.

Anyway, read on for how to get a that wah sound from the Roland SH-10A. If you want to find material about why the synth is working the way it is, you can read the other tutorial here:
Designing a Sound Using an Example from a Song – Getting the Wah Using the Korg Volca Keys

Reading the previous tutorial is not necessary. If you do, there are certain sections that you will probably like to check out if reading that tutorial.

Here is a list of sections that will help you understand the tutorial, especially if you do not have a Korg Volca Keys to use (simply scroll down and you will see these parts):
1) Diagram of the Korg Volca Keys - useful for the layout of controls. It is the second diagram.
2) So, What is a Filter Sweep? - under this section it explains what a filter sweep is, the thing that makes a wah sound.
3) ADSR Envelope under the previous section.
4) Working on Wah or Filter Sweep - See the altered ADSR diagram.
5) LFO Applications affecting the Low Pass Resonant Filter, the VCF - see the two diagrams on the LFO Cutoff Int affecting the Low Pass Filter

The Steps:

The SH-01A is laid out in a very straightforward fashion. I did not feel the need to record sound clips for this tutorial.

Here are the steps for getting a wah-type sound from the SH-01A:

Step 1: Slide all controls to zero.
Set VCA Env/Gate to Env.
Set Gate+Trig/Gate/LFO to Gate+Trig
Set LFO Waveform to rising saw wave.
Set Transpose to M.
Set Portamento switch toOff.
Pitch control is in the middle.
Sub Osc is set to 2 Oct Down but it makes no difference because we are going to use the Sawtooth oscillator by itself.
Even though single notes are being played, my SH-01A is set to Poly so I can play up to four notes when I want.
LFO section beside the control that selects the LFO waveform are three small sliders. Set them all the 0%.

I do not think there are Menu settings other than setting the synth to Poly that affect anything. If you are not getting what is expected from your SH-10A, back up your synth then reset it to factory settings.

Step 2: Slide the Sawtooth oscillator up to 100%. Set the Volume to an appropriate level.
Play notes and you should get no sound. I get no sound.

Step 3: Set VCF Freq to 50%.
Play notes and you should get a bassy pop.

Step 4: Set ENV Attack to 25%.
Play some notes. You should get a short note that does not plucky. The notes ease into maximum volume.

Step 5: Set Decay to 50%.
Play some notes and you get a note that rises and falls in volume.

Step 6: Turn up Res to 100%.
Play notes and get a tone that tracks with notes being played. There is also a self-oscillation in the filter. It does not track with the notes being played. (NOTE: Later, you can turn up the Kybd setting under VCF and the self-resonating filter will track with the notes being played. The tutorial used Kybd at 0%.)

Step 7: Turn up VCF Env.
Play notes as Env is turned up and the wah sound really starts to be heard.

Step 8: Record a sequence and play it back.
Tweak to your heart's content.

Take time to help people out. You will thank yourself later!

Sound Design - Getting the Wah Using the Korg Volca Keys

Here is the next tutorial involving synthesizers. This one explores how to make a wah-type sound using a Korg Volca Keys. Along with the previous tutorial released recently, I am trying a new format. You get the summarized steps at the top of the tutorial which will direct you in the shortest way I know how in getting the results of the tutorial's purpose.

By the way, if you think about things a little bit and try to match up the control knobs between the Korg Volca Keys and the Roland SH-01A, you can get your wah-type sounds there as well. This should work for just about any synth that uses subtractive synthesis, analog or virtual analog. I will post the steps for getting the way-type sound on the SH-10A in another post.

Please read on below because there is a lot of information to help you understand what is going on when you turn the knobs and use the controls of the synth. Sound clips are provided in the more detailed section. Enough with explaining the why and how...

Here we go!

HINT: All of the knobs on the Keys that are clear, except the VCF Peak and the Tempo knobs, light up when you turn them. That can help when figuring out the notch indicator is on them. The Peak does not light up at all. Tempo lights up in time with the tempo.

Step 1: Turn every control hard left. LFO is Tri, Trigger Sync is on, Step Trigger is on. Turn up the volume to something appropriate. Play notes and get a short bassy pop.

Step 2: Turn VCF Cutoff to 12 o'clock.
Play notes, get a short note that tracks with the note being played on the keyboard.

Step 3: Turn EG Attack to 9 o'clock.
Play notes, get a short note that eases into its maximum volume.

Step 4: Turn EG Decay/Release to 12 o'clock.
Play notes, get a slightly longer note that tracks with the note being played up and down the keyboard.

Step 5: Turn VCF EG Int to hard right.
Play notes, the notes are not as muffled. They are fuller sounding.

Step 6: Turn VCF Peak hard right, playing notes as Peak is turned higher.
Notes do not change much, to my ears anyway, and at the high range of Peak, a high pitched noise sounds.

Step 7: Ease back on VCF Peak. Play notes as doing so until the high pitched squeal disappears. That happens about 4 o'clock.

Step 8: Slowly turn up LFO Cutoff Int and listen to the notes you play.
The wah sound slowly occurs and then becomes more pronounced as Cutoff Int increases.

Step 9: There is a wah sound. Take note though, you can tweak this sound even more.

Step 10: Turn VCF Peak to the right as you keep playing notes. The wah sound becomes even more pronounced without the filter self-oscillating to the point where it becomes a high pitched squeal. I think this is because the Cutoff Int is higher so the roll off on the Cutoff frequency is sharper, reducing the higher end harmonics - in my opinion, thoughts, etc.

Step 11: Record a simple melody on the sequencer. Run it and now turn up the Decay/Release and listen to how it changes. Definitely some interesting changes. Use motion sequencing if you want to experiment and have some fun. Hint: Try smaller changes.

Step 12: Make sure motion sequencing is off at this point. Slowly increase Sustain and listen to the notes get longer in duration and fuller in sound. Try using the LFO Rate and Sustain for sounds approaching distortion in quality of timbre.

Now for the explanation:

Somebody asked a question on a group on the Web about how to get a particular sound that they had heard in a song. They provided a link to a video of somebody playing their song so the sound design could be heard.

I have been playing with synths for about five years but only within the last year or so have I started playing with synths and designing my own sounds. It is a lot of fun to do and make music with those sounds.

Using other's sounds as examples of something you want to use in your music is a great way to learn about synthesis. We are going to use the Korg Volca Keys to design the sound as that is what was used in the video. However, it should work the same way for any analog synth using subtractive synthesis.


Shows 12, 3, 6, and 9 o'clock positions
To the left is a clock face showing the 12, 3, 6, and 9 o'clock positions. This will come in handy later for referencing where to turn the controls when changes are made.


Using MIDI keyboard controllers

If you have a MIDI keyboard controller, you can use the controls on it to control the Keys. After I had finished making all the sounds for this tutorial, I mapped the controls for my Oxygen 49 Blue version to the Keys. I was already using the controller to play the keys and now I wanted to use the controls on it. The Oxygen 49 Blue has nine sliders and eight knobs among the buttons. I just mapped the sliders and knobs.

The issue of translating knobs on the Keys to sliders on the Oxygen 49 or any other keyboard controller with sliders is knowing how far the knobs go on a clock face. My best estimate comparing knobs on the Keys, Oxygen 49 and an Akai MPK Mini II is that knobs go from approximately 7:30 or 8 o'clock at hard left to 4:30 or 5 o'clock at hard right. On a knob, 12 o'clock is 50% or halfway of the slider's travel. Those are your guidelines for estimating positions between knobs and sliders.

If you are having a hard time comparing the Keys knobs to your controller's sliders, check the controller's knobs and sliders extremes. The controller's knobs are likely larger and easier to see.

Below is a representation of the Korg Volca Keys. As you can see, it does not have all the features on it. I put the ones needed for this tutorial. Missing are the power button, power jack, MIDI In jack, Sync In jack, Sync Out jack, and headphones jack. You could copy the representation below as a template for a patch sheet for the Keys are it has no memory for storing patches.

Korg Volca Keys

I have to admit, I do not try to imitate other people's sounds much so this will be an exercise for me.

Where to Start? 
The steps as summarized begin below. First I explain about picking out the sound from a piece of music.

The first thing to do is listen to the music to determine what sound it is that you are trying to emulate or imitate. The original post was using this YouTube video as an example: 

Click below to see and hear the example provided as a reference:
Example of Music

If that link does not work, do not worry. You can take just about any other piece of music that uses an analog synth with a wah-type sound as a reference for this tutorial.

The issue I have with listening to music is being able to isolate the different sounds to the point where I can definitely say that there is one particular instrument making that particular sound. Music is a blend of sounds, some more distinct than others. Some play the same melody as others and there are all kinds of different interactions. Before you go about emulating a specific sound, take some time to listen to the music first to pinpoint the specific sound.

In the video above, I listen until about the 1:10 (m:ss) mark where I can hear the Keys making a sound and it changes into something with a wah-type timbre to it. That is the sound I am going to focus on making.

One thing to note about wah-type sounds is that they wah from somewhere. That means to get there, you have to come from somewhere. There is a beginning point even if in the music the sound is always changing. It does not always have to change but it can. That means we have two sounds, in a sense. We have a base sound and the sound that is changing to make it the wah-type sound.

To make this a little more clear, in the video around that 1:10 mark, you can see the person changing some controls in what looks like the VCF section. That is good because a wah sound is a filter sweep.


Step 1: Turn every control hard left. LFO is Tri, Trigger Sync is on, Step Trigger is on. Turn up the Volume to something appropriate. Play notes and get a short bassy pop.

Starting from Zero

For fun to see where this goes, turn all the knobs hard left, everyone of them on the Keys, from Voice to Detune to Time and Volume. An alternative would be to set everything at 12 o'clock and adjust things from there. When you play notes now, you should hear nothing. See the diagram above with all the controls set to hard left. Now we are going to make some changes from zero.

Here is a representation of the capacitive keyboard on the instrument.You can use it for reference when looking at the settings to change on the keyboard as given later.


Capacitive Keyboard Labelled

There are some keyboard settings to be used. If you use different settings, you will get different sounds.

LFO: set the LFO waveform to TRI. Press and hold the Func button then press the Tri key in the LFO section on the keyboard. The LED for Tri should now be lit.

Trigger Sync: To turn on Trigger Sync press and hold the Func button and press the Trigger Sync key on the keyboard. The Trigger Sync LED should now be lit.

Step Trigger: To turn on Step Trigger, press and hold the Func button and press the Step Trigger key on the keyboard. The Step Trigger LED should now be lit.
Voice and Octave
The Voice control should be set to Poly and the Octave control should be set to 32'. If you are using a MIDI keyboard or something through your computer to play the Keys, the Octave knobs should not really matter. Turn up the volume to something appropriate. Play some notes and you should hear a bassy pop.


Click on the link provided below to hear what it should sound like:
Bassy Pop


Step 2: Turn VCF Cutoff to 12 o'clock.
Play notes, get a short note that tracks with the note being played on the keyboard.

VCF, Voltage Controlled Filter
In the VCF section, turn Cutoff up to 12 o'clock. Now play some notes and the pitch of the note will sound appropriate for the key being played. The notes should sound very short, quite like staccato even if the next key being played is being pressed down while the previous key is being released. Attack is very short so the notes sound immediately and all other envelope generator (EG) settings are set to zero so there is no sound past the initial quick burst.


Cutoff Frequency at 12 o'clock
                        Click the link to the sound file below to hear what the Keys should sound like now:

VCF Cutoff at 12 o'clock


For now, we are going to be focusing on playing one note at a time to be able to hear the sound of only the one note. It makes it easier to realize what is going on with the sounds you are hearing. There are lots of situations where playing three notes on the Keys is needed, but not here.

There are different ways to approach sound design. Some people take another person's preset (the presets that come on other synths were made by a person) and tweak the controls until they get something different from the original which they like. Other people design sounds from the ground up. They can start with the oscillators and work with a particular goal in mind and they usually follow a specific procedure, such as working on the envelope generator next, then the filter section, the amplifier section, etc. Both approaches work and have merit.

Tweaking presets and studying them as you tweak them allow you to understand them that way. Working from the ground up allows you to work with the sounds in a way where you understand individual synth sections and the effects they can have one at a time. There can be combinations and the two are not mutually exclusive. That means both approaches can have similarities and work flows. You just have to try both to see what works for you. There is nothing to stop you from working with one method one time and using another method another time or changing between.

Using both approaches might include taking a preset and turning all the controls hard left except for one section such as the envelope generator section. Then you can build up a preset from zero with all the rest of the controls.

Again, we are going to start from zero.

So, now you can see that there are different methods and we are starting from zero. We have opened up the filter a little so that the Cutoff allows more than just the lowest bass frequencies through. But, what I want to express is that you can put some real thought into sound design. Above, I mentioned that a wah-type sound is a filter sweep. How do we accomplish that on the Volca Keys?

My take on the Volca series of synths is that Korg has worked on providing synths or grooveboxes, in an affordable form factor that give the musician the most value for their dollar. This means that they have designed the Keys in such a way so that controls can be used for more than one purpose. The EG or envelope generator section is always applied to the oscillator amplitude. That means that the volume of the oscillator is affected by the envelope. The EG can also be applied to the frequency of the oscillators and the cutoff frequency of the the filter. This is good because now we can look at how to do a filter sweep on the Keys.
So, what is a Filter Sweep?

So, a filter sweep or a wah sound is what happens when a filter changes its cutoff freqeuncy up or down.

With a filter sweep, in my opinion, you want to be able to hear any effects immediately for the most punch. That is subjective, so take it as you will. In the end you are creating a sound so it is up to you to decide. Set the goal to hear the filter sweep immediately. Let us have a look at a typical envelope below.

There are four parts to an ADSR envelope. For some reason, it was the sustain part that eluded me in its true meaning for the longest. We will get there in a minute. Let us use an ADSR applied to the volume of the amplifier section of a synth.


Attack: This is the time it takes for the note to rise in volume from zero to its highest level. At its highest level it meets where the Decay starts.

Decay: This is the time it takes from where the Attack leaves it at the high level to go to the level at which the Sustain level is set.

Sustain: Sustain is different than the other controls in an ADSR envelope. Sustain is always at the same level. When a note is played, if the note is held long enough to get through the Attack and Decay portions of the envelope, the note will sound as loud as the level set by this control. When the note is released the Sustain portion ends and Release begins.

Release: This is the time it takes for the note to lower in volume from the level set by Sustain to zero.

What was just explained was how the ADSR envelope affects volume. However, an ADSR envelope can affect other controls such as the pitch of one of the oscillators (or more) or the cutoff frequency of frequency of a low pass filter. The Keys has the ability to both of those things by the use of the EG Int control under the VCO (Voltage Controlled Oscillator) and VCF (Voltage Controlled Filter) sections. We are going to use the EG section on the VCF Cutoff Frequency. Decay and Release are controlled by the same knob on the Keys.
Working on Wah or Filter Sweep
The wah sound will be heard more effectively when there is no sustained frequency level between when the note reaches its peak and zero. Remember, we are now applying the envelope to frequency. That works, at least in theory. What this means using the diagram of the ADSR envelope above is eliminating the Sustain portion. The diagram below is what that looks like.

Take note that because Sustain is at zero, Release no longer affects the sound.
ADSR Envelope, Sustain at Zero


Using the diagram of the ADSR envelope above, with the Sustain set to zero, we get a filter sweep that goes up and down. Now we can move on to making the changes to the controls to make a filter sweep or wah.

Step 3: Turn EG Attack to 9 o'clock.
Play notes, get a short note that eases into its maximum volume.

Set the Attack at 9 o'clock.

Click the link below to listen to how that sounds:
EC Attack at 9 o'clock


Step 4: Turn EG Decay/Release to 12 o'clock.
Play notes, get a slightly longer note that tracks with the note being played up and down the keyboard.

Turn Decay/Release to 12 o'clock.
Sustain stays at hard left or zero.
Play some notes at this point and it is not all that exciting in terms of sounds. Actually, it does not change much at all as the note plays.

Click the link below to hear the results:
EG Decay/Release at 12 o'clock


Step 5: Turn VCF EG Int to hard right.

Play notes, the notes are not as muffled. They are fuller sounding.


Waht we need - see that! Waht we need is the filter sweep to have an effect. Under the VCF section, turn the EG Int control all the way up, or hard right. Now the tone is not so muffled. What has happened is the envelope affecting not only the amplitude of the note, but the Cutoff frequency of the note as it plays over the time it sounds. With EG Int hard left, there is no variation in Cutoff frequency.

Click the link below to hear what the Keys should sound like now:
VCF EG Int at hard right

Step 6: Turn VCF Peak hard right, playing notes as Peak is turned higher.
Notes do not change much, to my ears anyway, and at the high range of Peak, a high pitched noise sounds.


VCF Peak at hard rightNow we can use the the VCF Peak control to increase the frequencies around the cutoff point. Turn the Peak to hard right but, as you do so play some notes. You will start to hear a pronounced wah sound. Near the end of turning Peak to the hard right, the filter will start to self-oscillate. That means you should hear a high pitch. In this case the note you play also plays and the self-oscillating pitch tracks with the note being played.

Click on the link below to hear what that Keys should sound like now:
VCF Peak at hard right

Step 7: Ease back on VCF Peak. Play notes as doing so until the high pitched squeal disappears. That happens about 4 o'clock.


VCF Peak at 4 o'clock
Turn the Peak back to about 4 o'clock  which is approximately where the self-oscillation of the filter stops with these settings. Play some notes now and now you should really hear a decent volume sound. Turning up the Peak control has increased the amount of frequency volume at the cutoff point of the filter. There is a filter sweep but not quite a wah sound yet.

Click on the link below to hear how that should sound:
VCF Peak at about 4 o'clock


Step 8: Slowly turn up LFO Cutoff Int and listen to the notes you play.

The wah sound slowly occurs and then becomes more pronounced as Cutoff Int increases.

LFO Applications affecting the Low Pass Resonant Filter, the VCF

In many cases on a synth, the LFO affects the volume of the notes being played. The Keys allows volume to be affected using the Envelope Generator. Looking at the Keys manual, you can see that the LFO can affect the filter and the pitch of the oscillators.

Korg provides the PDF of the owner's manual on their website. You might find it easier to read as a PDF by enlarging it in a PDF viewer. The easy way to enlarge a PDF is to use the shortcut key, Ctrl- + (Linux and Windows) or Cmd- + (MAc OSX). Use Ctrl- - or Cmd- - to reduce the size. This also works for webpages so if you need to enlarge this post to read it more easily, do the same.

We still have the VCO EG Int set to hard left, or zero, so no modulation or variation in pitch is used at this point.

Even though Pitch Int will produce an effect in the VCO, even though VCO EG Int is set to hard left, we do not want to use that here. So, not Pitch Int.

The control we want to use to affect the filter sweep if LFO Cutoff Int. Turn it hard right. As you turn it, play some notes to hear its effect on the sound.

Click the link below to hear how the Keys should sound at this point:
LFO Cutoff Int hard right

My best guess as to why the sound becomes muffled at the end of the clip for this step is that Cutoff Int has become so much that the Cutoff frequency is dropping sharply so the higher frequencies are not heard so much. The harmonics have been attenuated. You can look that up, but suffice it to say when you play a note on any instrument, you will hear not just the frequency of the note being played. There are other frequencies that occur above it.

Here is an example of the filter effects. The frequencies before the Cutoff frequency are heard. There is a Peak around the Cutoff frequency. The amplitude decreases after the Cutoff frequency.
Typical Frequency Response of a Low Pass Resonant Filter

The diagram below shows the Cutoff frequency and Peak with a different shape than the diagram above. The slope after the Cutoff frequency and Peak also drops much more sharply. Without using an oscilloscope and the math, this is what I imagine is happening to the VCF.

Cutoff Int Set Hard Right
Try turning Cutoff Int back to 1 o'clock or 2 o'clock to see if you like that sounds any better.

Step 9: There is a wah sound. Take note though, you can tweak this sound even more.

Step 10: Turn VCF Peak to the right as you keep playing notes. The wah sound becomes even more pronounced without the filter self-oscillating to the point where it becomes a high pitched squeal. I think this is because the Cutoff Int is higher so the roll off on the Cutoff frequency is sharper, reducing the higher end harmonics - in my opinion, thoughts, etc.

Click the link below to hear what the Keys might sound like now:

Turn VCF Peak slowly to the right, hear a more pronounced wah

Step 11: Record a simple melody on the sequencer. Run it and now turn up the Decay/Release and listen to how it changes. Definitely some interesting changes. Use motion sequencing if you want to experiment and have some fun. Hint: Try smaller changes.

Try larger changes as well. Experiment with it.

Click on the link below to hear an example of how the Keys can sound:
Changing Decay/Release from 12 o'clock to hard right and back

Step 12: Make sure motion sequencing is off at this point. Slowly increase Sustain and listen to the notes get longer in duration and fuller in sound. Try using the LFO Rate and Sustain for sounds approaching distortion in quality of timbre.

Click the link below to hear what the Keys can sound like now:
Keys with changing the Sustain

Listening to Other People's Music
Listening to other people's music and choosing your sound as your goal can be a great place to start designing sounds. This tutorial has given me new appreciation for the practice of covering other people's music. Before, I was mainly working on my own sounds from scratch but not really having a predetermined sound in mind. When you are starting out this way is exciting for awhile but you can get stuck in designing similar sounds.

In my opinion, the ability to make great sounds will be gained from experience over time and effort. Use the tools you have - recordings that are available in so many ways these days. I am sure I will start from scratch along the way with nobody else's sound in mind but, I am also learning how to design those new sounds from developing from the sounds I hear.

Conclusion

There are a wide range of sounds to be had using the controls in this tutorial. Both the knobs and the keyboard settings can be changed for different effects. Also consider the Voice control and if you are using the Keys by itself, change the Octave knob to get different ranges of sounds according to pitch.

Years ago, I went to a weekend workshop and brought my Yamaha F310, their entry level acoustic guitar at that time. I even wrote a song while there about all the people taking part. There was a guy there with his partner whom said he played semi-profressionally. I wondered if he could really make my guitar sound better or if that was something people just said.

He made that guitar sounds incredible. It sang. The quality of the timbre was not great but the music came across and was appreciated by all those whom listened. One more testatment to the saying that "it is not the instrument but the person playing it that makes it sound great."

Share the knowledge!